How to download DVD video iTunes Wifi file to Zune 2
- Inicie sesión o regístrese para enviar comentarios
Simple introduction about Zune 2
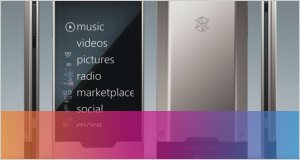
Glass: The plastic screen has been replaced with actual glass. On a hardness scale of 1-10 where 10 is a diamond and 1 is an iPod, glass is 5.5. This is a major improvement over the Zune 2 30.
Video Out: The new Zune 2 80 will have a video out resolution of 720x576 maximum. This is for TV output and easily beats the original Zune 2's 320x240 output. The LCD itself is the same 320x240 however. Warning to Zune 2 4/8 shoppers, there is not video output to TV on those flash memory units.
Smaller: Yes the Zune 2 is much smaller in size this generation. It actually weighs less than the latest 80gb iPod. This weight difference could be and advantage for Tour de France competitors and people who don't like to weigh down the school backpack with hefty devices.
WiFi: Would you like to be the first on the block to sync your player from the car in the driveway? Very 007-ish, Q would be proud.
FM: Most players require an expensive ($49) add on accessory that sticks out the bottom of the player. Built in FM is just smart.
Squircle: The Zune 2 Pad offers both tactile d-pad type control and also touch sensitivity. Have your cake and eat it too.

Supported Video format:
Windows Media Video (.wmv): Main Profile, CBR or VBR, up to 1.5 Mbps peak video bitrate, 320 x 240 pixels, 30 frames per sec., with Windows Media Audio up to 192 Kbps, 44.1 kHz, stereo audio; Simple Profile, CBR, up to 736 Kbps video bitrate, 320 x 240 pixels, 30 frames per sec.
Part One: Convert DVD to Zune 2 video
Part Two: Convert Video to Zune 2 video
Part Three: Download the video or audio to Zune 2
Part Four: Use Zune 2’s WiFi to share the music
Part One: How to Converter DVD to Zune 2
1 Download Daniusoft DVD to Zune Converter (Supports Window Vista), Install and Run it.
2 You can click on “Load File” to add DVD/IFO from your hard disk. Or insert your DVD disc into your DVD-Rom.
Click “Load DVD” button to add the DVD file.
3 This software can convert DVD to all Zune 2 video. Click the “Format” drop down list to select a format.

4. If you want to convert DVD by default settings, just click “Start” button to convert. It is the easiest and common way to convert with only three steps.
Part Two: Convert Video to Zune 2
If you want put the video on your Zune 2, make sure the video formats are as follows: WMV, MP4, because the Zune 2 only support these video formats. If the video which you download by limewire do not meet the requirement, you can use Daniusoft Zune Video Converter to convert it.
The process is the same as download DVD to Zune 2
“Add” button to load video -> Choose output “format” -> “Start” Convert
Note: You can click the “Settings” button next to the format field to open the Settings window and set video resolution, frame rate, bit rate, encoder, etc
Tip:
1. Trim – If you only want to convert the part of the video, here you can trim any segment of your clips to convert video by click the “Trim” button.

2. If you want to adjust the volume, just click on “Effect” button. You could adjust the volume by drag the button.
And you may only use Daniusoft DVD to Zune Suite which is composed of DVD to Zune and video to Zune.
Part Three: Download the video or audio to Zune 2
After finish conversion, add your converted files to Zune 2 software and click “Sync contents to and from your Zune 2”, then you can enjoy your video or music on Zune 2. You can download the Zune 2 software free from here: [url]http://www.Zune 2.net/en-us/meetZune/software.html[/url]

Part Four: Use Zune 2's WiFi to share the music
Engaging the WiFi allows you see what other Zune 2 users within the approximately 30-foot range are listening to, and you can transfer one of your songs or pictures to any other Zune 2.
The following will tell you how to share the music with the WiFi step by step.
1. Find the music which you want to share with your friend, and click it.
2. You will see the option “send”, click it. Zune 2 will search the other Zune 2 beside you. After searching finished, you will get a list of the number of Zune 2 users beside you, and then choose your target user, the transfers begin.
3. After about 15 seconds, the song transfers could be finished, and your friends can share your music on their own Zune 2!


